E is for Envelope
I take zero credit for this idea. It is purely inspired by notimeforflashcards.com (specifically this post). But here is our interpretation of it:
We started by taping 2 pieces of construction paper together. Lucy loves to tape. Then I drew a big "E" outline so she knew where to put the glue. Finally, we glued the envelopes in place. I wrote an uppercase E on the top and bottom envelopes and a lowercase e in the middle.
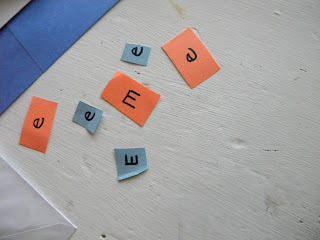
Then Lucy put the big E's in the uppercase E envelopes and the little e's in the lowercase e envelope. (Whew! Follow that?)
Finally, we broke out the paints. The original project on notimeforflashcards.com said to decorate the envelopes with markers, but Lucy would have none of that. She doesn't think a project is complete unless it is painted. Haha.
Finished product:
We started by taping 2 pieces of construction paper together. Lucy loves to tape. Then I drew a big "E" outline so she knew where to put the glue. Finally, we glued the envelopes in place. I wrote an uppercase E on the top and bottom envelopes and a lowercase e in the middle.
I found some pre-cut construction paper squares from a project we had done a long time ago and wrote E's on them.
Then Lucy put the big E's in the uppercase E envelopes and the little e's in the lowercase e envelope. (Whew! Follow that?)
 |
| Please excuse the Elmo pajamas that are 2 sizes too small. |
Finished product:
 |
| Voila! |


Comments
Post a Comment